PMCHY

PMCHY
The Dragging Equipment Detector at State Line, KY

Friday, July 24, 2020

Construction Update #11 - More Locomotive, A Company Town & Upper Level Staging

Roster Additions


Five locomotives were added to the fleet over the last week or so. C&O #8774 is a Atlas Master Series B30-7.  It got the standard upgrades to include a Tsunami2 sound decoder, a TCS Keep Alive, Kadee #58 scale couplers and some moderate weathering.  CSX #7224 is a Atlas Master Series U-30C that got the same treatment but it has yet to be weathered.


Chessie #4340 and CSX #3103 are Both late run Atlas Master Series locomotives  Both got the standard upgrades; Tsunami2 sound decoders, TCS Keep Alives, and Kadee #58 Couplers.  #4340 got light weathering and #3103 has yet to be weathered.  Both locomotive we set up for and got 21 pin Tsunami2 decoders; a first for me.  The keep alive leads were soldered directly to the Atlas mother boards per instructions provided by Soundtraxx.  Soldering the keep alives to the mother board turned out to be much easier than I originally thought.  The GP40-2 also got upgraded with "Natural Light" LED's from Evans Design.  The Evans Design LED's come in several sizes ranging from tiny to small and are pre-wired with resistors/rectifiers for use with 7-19 volts.  I protected the leads where they attach to the LED with clear fingernail polish.  The tiny leads are lacquer coated and should be handled with care.  


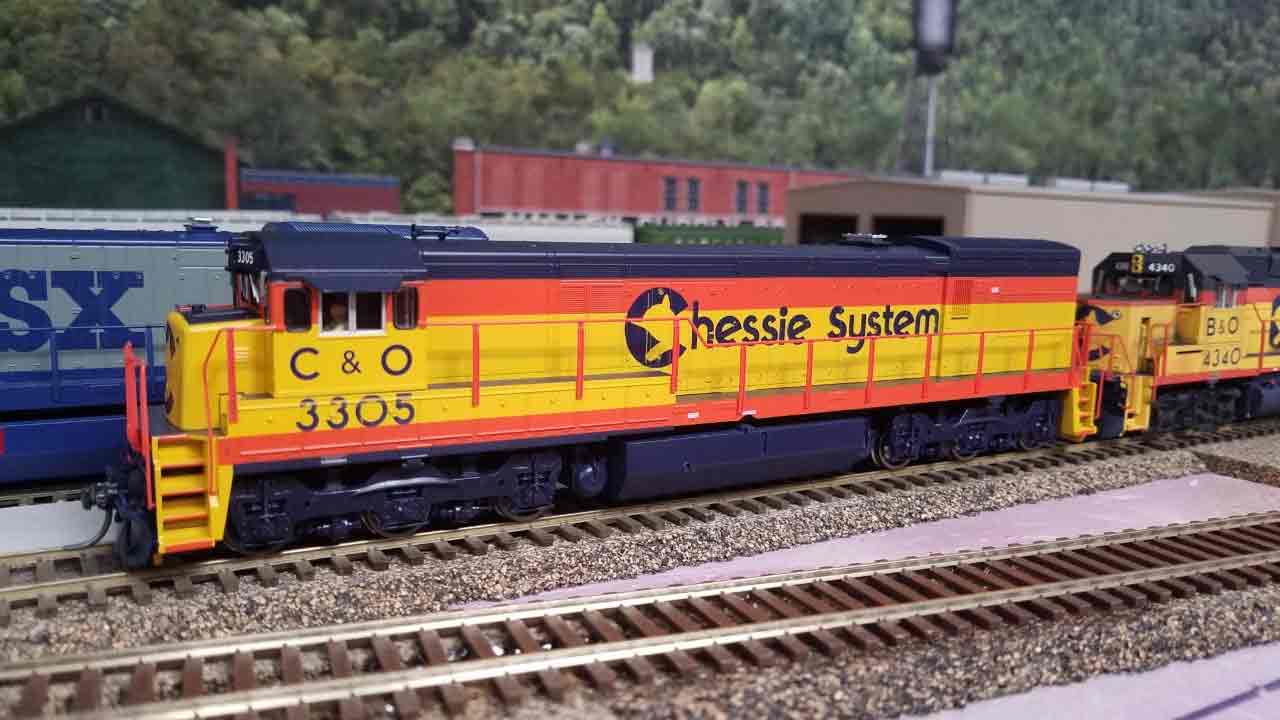
The fifth locomotive added to the fleet was another Atlas Master Series U-30C.  Chessie #3305 got the standard upgrades and is another locomotive waiting to be weathered.


For those of you who are interested, here is a copy of the photograph sent to me by Josh Levine at Soundtraxx.  I suspect, but have not verified, these solder points will work on any 21 pin motherboard regardless of who manufactured the model or the decoder.


Grundy - A company town


As I have mentioned in previous updates, the Union Mining Company tipple and company town of Grundy are planned for the area directly above the helix.  I finally got back to Lowe's for a couple of sheets of plywood so I decided to start working on this area even though I was short a turnout.   I used part of a sheet for the upper level return loop and the rest at Grundy.  The upper section of the helix will wind around the left side Grundy and duck into a tunnel above the c-clamp on the left hand side.


The tipple will be located at the end of a box canyon with the company town located on a hillside to the right.  That/s the Coalmont Branch on wall and extending to the right above the door in the background.  The branch will terminate in the corner to the right of the door.


All the track work and electrical installed.  Currently, I planning on two locals working this area.  The first will originate here at Grundy, collect loads from the local tipples and load outs, and run down the hill to Preston Miller Yard in Bowling Green.  On the way back it will work Grundy and continue up the Coalmont Branch.  The second local will work the same locations only in reverse.  It will originate in Coalmont, work its way down the hill to Preston Miller Yard in Bowling Green and return to and terminate in Grundy.  The Union Mining Company tipple will ship about 8-12 cars a day.  The house track holding the power for the Mountain Local.  The spur is equipped with an on-off switch to kill the power.


The Upper Level Staging Yard


The upper level staging yard is situated just beyond the summit at Crockett. The upper level staging consists of a large reverse loop with 4 long double ended staging tracks.  The train shown in the photo is on the westbound main.  The eastbound main is on the far side of the tracks.  The tracks here will run down a shallow valley before slipping behind a low ridge line and into staging.  The train is located at the current end of track.


Peco code 83 track and #8 turnouts are being used for the upper staging tracks.  The eastbound main and staging yard throat are up against the wall.  The west bound main is in the right foreground.


Here's what the throat looks like from the underside


Here's another view of the upper level staging yard throat.  The yard will extend to the left, across the top of the garage door and into the dispatchers office.  The lower level stub end staging yard will be on the lower level.  These tracks will hold about 25 cars, three locomotives, and a caboose.


Here's a photo of the dispatchers office.  The bench work for the lower level staging yard is on the left.  The upper level staging and reverse loop will run along the perimeter of the room about 80" above the floor.  This room is about 6' x 8', just large enough for the reverse loop's turn back curve.


And finally, here's a photo of  my spray booth.  It's been sitting on the floor, out of use, for the last 19 years.  It is equipped with lights and a explosion proof fan that vents to the outside.


Wednesday, July 8, 2020

Layout Tour

Significant progress has been made over the past 3 months so I thought I would use a post for a layout tour.  The main line is fully functional from the entrance to the lower staging yard to the entrance of the upper staging yard and reverse loop. 

The western end of line is in Madisonville. Kentucky (staging)   The Madisonville staging yard will be along the west wall of the room.  At the east end of the yard, the mainline will make a 90 degree right turn and head down then north wall.  Smith Grove, KY and West Bowling Green occupy the north wall.  The General Motors Bowling Green assembly plant is located in Smith Grove.  The plant is supported by a small yard  (GEMCO) and yard office.  The Smith Grove Local originates here daily except Sundays.

(1)  Power for the Smith Grove Local is tied up at the GEMCO yard office.  That's the GM plant in the background.  GM makes Corvettes at the Bowling Green assembly plant.  As I understand, the finished Corvettes are trucked to a loading point outside of Kentucky before being shipped by rail or truck to dealers. 


(2) We're going to follow the MC1 (Madisonville Chattanooga Expediter) around the layout.  The MC1 originates in Bedford Park, IL (CSX) and it consists primarily of auto parts, empty Tropicana reefers on their way back to Florida, and TOFC.  Eventually there will be a hotel, gas station, and a couple of fast food resturants here in the background.  For now... Use your imagination.  The WP box car will be set out in the GEMCO yard (left foreground),


(3) Further down the north wall is Hills Pet Nutrition in West Bowling Green.  Hills Pet Nutrition is one of Bowling Green's largest employers.  The acutal Hills looks nothing like the model.  Hills receives grain products and corn syrup by rail, and ships out pet food.  MC1 is about to swing to the right and enter Preston Miller Yard in Bowling Green.


(4)  MC1 is passing through Preston Miller Yard in Bowling Green.  Located on the east wall of the room, the yard is about 26 feet long. MC1 doesn't normally stom at PM.  Additional yard tracks will eventually occupy the space in the left foreground.  I have plenty of flex but finding Micro Engineering Code 70 #6 turnouts has been difficult.


(5)  Southern Kentucky Feed & Grain is at the east end of the yard along with the MBG&C engine facility.  Most of my locomotives are Atlas and all my locomotives are equipped with Soundtraxx Tsunami2 sound decoders and TCS KA1 or KA2 current keepers.  Hot frogs and stalls are a thing of the past with current keepers.   Just about all my turnouts have drops to install frog juicers but with current keepers in the locomotives I have come to the conclusion that hot frogs are a waste of time and money.


(6)  Today's MC1 has a ex SCL extended vision caboose on the bottom end.  I should probably change the number for CSX but I don't get to excited about those kind of details.  Those pig flats are destined for Jacksonville, Florida.


(7)  Another curve to the right, this time 180 degrees, brings MC1 down the center peninsula and over Romanza Creek (Previously No Name Creek).  The peninsula is about 22' long so it nice long run of single track.


(8) Once across Romanza Creek, the track swing around the end of the penisula and enters Westmoreland.  Westmoreland is the site of the CEMEX redi-mix plant, Amerigas, a team track and the base of a 2.2% grade (helix) to the upper level.


(9)  The helix was a cause for concern when I was planning the layout.  The plan required that it be in the narrowest part of the room which meant that a wider radius on the helix meant a narrower aisle somewhere else.  I ended up with a 30" radius on about a 2.25% grade.  As it turned out, the radius hasn't been a problem.  I have run 30 car trains, including 89' flats, up the helix with all the power on the front end or with helpers cut in ahead of the caboose without a problem.  I do wish I had cut the roadbed a little wider.  Side clearances are tight for long cars. 


(10) Grundy is at the top of the helix.  The grade levels out here to facilitate the switching of several load-outs (coal).  Eventually a large tipple and company town will be located withing the loop directly behind the Tropicana reefers.  Here at West Grundy there will be a control point and as a result one of the less than a dozen powered turnouts on the layout.  If you have read my previous posts, you already know that I plan to use the Atlas "plug and play" Signal System.


(11) Grundy is a coal mining town.  The Grayson McClure loadout is in the foreground and the spur above the locomotives leads to Dunleary Coal.  This area is directly above Westmoreland on the lower level. 


(12)  East of Grundy, MC1 is back on the 2.25% ruling grade.  The manifest sitting at Crockett (summit) is at the end of double track, sitting on the westbound main, waiting for MC1.  Romanza Creek and bridge are directly below this scene.


(13)  MC1 is approaching the loop around to the summit.  The two hoppers seen above the locomotives are sitting at the Claywell Mining loadout on the Coalmont Branch.  The branch crosses over the mainline and into a tunnel {staging} representing the rest of the branch.  Currently the branch is a single track but I have been thinking about adding a second one.  Theoretically, there are three customers on the branch; two lumber companies and the Spillman Mining Company.


(14) MC1 has just crossed the west switch at Crockett on the eastbound main. Lighting is a problem on the upper level that I haven't quite figured out.  At this point, MC1 is about 20 inches from the ceiling and the florescent lights are creating hot spots.


(15) And finally, MC1 reaches the summit at Crockett.   MC1 is already on the reverse loop that will include the main track and 4 staging tracks.  At Crockett, there is a crossover between the east and west mains to facilitate the dropping off of helpers, a house track, and the junction with the Coalmont Branch.  A small depot and tool/speeder shed will be located in the flat area in the left foreground.  There will be another shed and telephone booth down at the cross over. 


(16)  MC1 has cleared the west switch at Grundy and the 8000 is creeping down the westbound main in anticipation of a clear signal at West Grundy.  This train is NS28, a Chattanooga to Preston Miller Yard (Bowling Green) manifest with traffic off the Norfolk Southern.
t

Finally, if you would like to be notified when a new post is added, click on the "Follow" button at the top of the page or send me your email address at sdepolo@outlook.com and I will add your address to the list.  If you would like to be taken off the existing list, please let me know that too.


Saturday, June 27, 2020

Construction Update #10 - Scenery Base on the Upper Level

Painters Paper Scenery Base


Over the last month or so, I have been looking at alternatives to traditional methods of creating scenery.  I needed something to protect the lower level, that was lightweight, quick and easy, and relatively inexpensive.  On the Sn3 layout a solid pink foam base covered by a layer of plaster cloth worked great.  But, the cost associated with using all that pink foam was something I really needed to avoid this time around.  One of the "you tubers" (railfan220), as my grandson Adam calls those of us who spend way to much time looking at video/s, came up with the idea of using painter's paper over cardboard webbing to create a scenery base.  As it turned out, I used one sheet of 1" pink foam, 5 or 6 cardboard boxes, and one roll of painters paper to cover the entire second level.  Total cost, less than $50.00 including the glue.  Eventually, I will probably cover the painters paper with a layer of plaster cloth and a layer of earth colored latex house paint before adding ground cover, vegetation, trees, and other details.
 
Here is what it looks like when its done.  Not bad, huh?


The process starts with drawing a ridge line on the backdrop with a black felt pin.  Then pink foam  profile supports, spaced about 6-8" apart are glued in place using hot glue.  Next, cardboard strips are glued in place along the ridge line.  These were cut, across the corrugations, using a flat bed paper cutter.


The cardboard strips are then bent down, roughly following the contour of foam profile boards, and glued to the edge of the roadbed.  The lower level is done the same way; first gluing to the side of the roadbed and then to the side of the lower roadbed. 


The webbing is next.  Since this picture was taken, several months ago, I have found that gluing a cardboard strip along the top of the webbing, next to the backdrop, is a good idea.  It helps to have a smooth service on the upper edge when applying the painters paper.


Painters paper is available in most hardware stores.  I bought this roll at my local Ace Hardware.  It comes in various sizes and it was marked "for latex paints".  This roll cost about $7.00.


Unlike the webbing, I found that it was easier to start at the bottom.  I wadded up the painters paper and then folded over the lower side by about a 1/4".  A bead of carpenters glue was put down along the edge of the roadbed and the painters paper was pressed into the glue.


I normally let the glue set up for two or three hours before trimming off the top, running a bead of glue down the sides of the painters paper and along the top of the webbing.  The painters paper is then stretched out and pressed into place.


The summit at Crockett, before:


After:


It's surprising how sturdy the end result is and now I don't have to worry about anything dropping through the bench work and damaging something on the lower level.  I spread the work over a week or so but the entire upper level could probably have done in a couple of weekends.

Note:  Since I started this process, I have run across a couple of other examples of this type of scenery base.  Several skipped the pink foam profile boards in favor of just using the cardboard webbing.  Unless you plan to use multiple layers of plaster cloth, over the painters paper, I don't recommend omitting the pink foam profile boards.  I tried it and the end result was easily deformed and not nearly as strong.

On the work desk


I am slowly back dating the layout into the mid to late 1980's.  As a result, I picked up a couple of  Chessie units off ebay.   Both are my preferred Atlas "Master Series" locomotives, a GP40-2 and a B30-7.  The GP40-2 was a real bargain but the previous owner had really butchered the cab by trying to attach the sun shades and wind deflectors with ACC.  By the time I got all the ACC cleaned off the cab, It needed a repaint.  It also had a 21 pin adapter for a sound deoder which was all fine and dandy until I discovered there was no easy way to install a "current keeper" along with the new 21 pin Tsunami2 decoder.  As it turns out, the "current keeper" can be soldered onto the Atlas motherboard or the Tsunami2 (Soundtraxx technical support) but the work requires a tiny soldering iron and some serious magnification.  I've ordered the soldering iron from Nngineering so I guess I will give it a try.  Since the GP40-2's were the last locomotives purchased by Chessie, before the CSX merger, it has been lightly weathered.

The B30-7 is a simpler project.  It arrived in perfect condition so all it really needed was some moderate weathering and the installation of  the sound system.  I usually sacrifice the rear lighting in order to install the largest speaker and enclosure possible and preserve the weight.  It will get a PNP Tsunami2, a TCS KA1 or KA2 current keeper, and scale #58 couplers.  Both locomotives should be ready for service in the next couple of weeks.


Finally, if you would like to be notified when a new post is added, click on the "Follow" button at the top of the page or send me your email address at sdepolo@outlook.com and I will add your address to the list.


Saturday, June 13, 2020

Construction Update #9 - Preston Miller (Bowling Green) Yard & Rolling Stock

Preston Miller Yard


The last two weeks have been spent working on Preston Miller Yard in Bowling Green.  All the track and electrical is in on the east end of the yard and the engine facility.  The west end will have to wait for additional materials due to arrive next week.

 Looking west.


Looking east.  The Southern Kentucky Feed & Grain elevator (red structure) is new.


As each section of the layout come online, I like to run a train.  Not only does running a train insure the newly laid track is bug free and functional, it's fun.  And, the satisfaction of seeing something move inspires me to keep building.  Noticing that the yard was pretty full, I decided a eastbound BGC-1 was in order.


BGC-1 is a eastbound Bowling Green to Chattanooga general merchandise freight.  A quick survey of the engine facility revealed that plenty of power was available


Two recently shopped U30-C's and a CSX B23-7 are the power. The "Bigs", as the U30's are refferred to by MBG&C crews, will be required for the 2.25% ruling grades between Westmoreland and the summit at Crockett.  Coupled on to the first half of their train, the units are about to double over to the adjoining track and pick up their remaining cars.


Ex Chessie System bay window caboose brings up bottom of the train as BGC-1 departs Preston Miller Yard in Bowling Green for Chattanooga.


Rolling Stock


In the last update, I included several pictures of my rolling stock.  Those cars, for the most part, were higher end rather delicate models from Intermountain, Athearn Genesis and Atlas.  For an operating layout, where rolling stock is likely to get handled, I like many of the more entry level cars with cast on details.  Walthers Mainline. Accurail, Stewart/Bowser, Atlas Trainman and some Athearn/Roundhouse cars fall into this category.

Norfolk Southern 17734 is a old Roundhouse car.  The stirrup steps have been replaced and it has been weathered with Bragdon Enterprises powdered pigments and some light airbrushing.  Kadee #58 couplers and metal wheel sets have also been added.


Southern 557 is a Walthers Mainline car "right out of the box" RTR car with replacement Kadee #58 couplers and metal wheelsets.  It was lightly weathered using Bragdon pigments and a airbrush.


Here is the Accurail version of the same car.  I had never seen a picture of the prototype with green doors so I fired off a email to Accurail asking about the doors.  It turns out, the prototype doors were originally unpainted aluminum which appeared green in the photograph Accurail used as a reference to paint the doors.  To their credit, Accurail painted up some replacement doors and sent them to me.  I kind of liked the green doors so I decided to leave them on the three cars I had already built.  I have several more of these kits so any future builds will have the correct color doors,  Again, the original wheel sets and couplers were replaced.


Penn Central #888248 is another Accurail car.  Again, all that been done is to change out the couplers and wheel sets and add a little weathering.


And finally, here is a Athearn Genesis car that was weathered by a young friend of mine, David Howland.  Its really nice to see young modelers this talented.  Fortunately, David has the support of both his parents when it comes to pursuing the hobby.  Dave and his father Roy prefer more modern equipment so you probably won't see one of these rolling around on the new layout they are building in their basement.