
Upper Level Valence
Back in update #43 I covered the installation of the upper level under counter lighting fixtures. After nearly two weeks of hardly leaving the house, I finally got to Lowe's for a piece of Masonite and a few sticks of lumber. The valence on the upper level was cut in 8' x 6" strips and mounted to 1x2 furring strips that were screwed into the ceiling. Most of the "bare earth" shown in this photo will eventually be covered with poly fibre Kudzu and static grass.

The valence was only installed where some level of scenery is done; its much easier to work on the scenery on the upper level without the valence. One thing is pretty clear, the backdrop on the upper level has to be raised.
Lower Level Valence

Once the brackets were in place, a 1x4 was attached to the bottom of the brackets. Since the lower level valences are about 18" above the roadbed, the bottom of the 1x4 is about 20" over the roadbed. The brackets are about 8' apart.


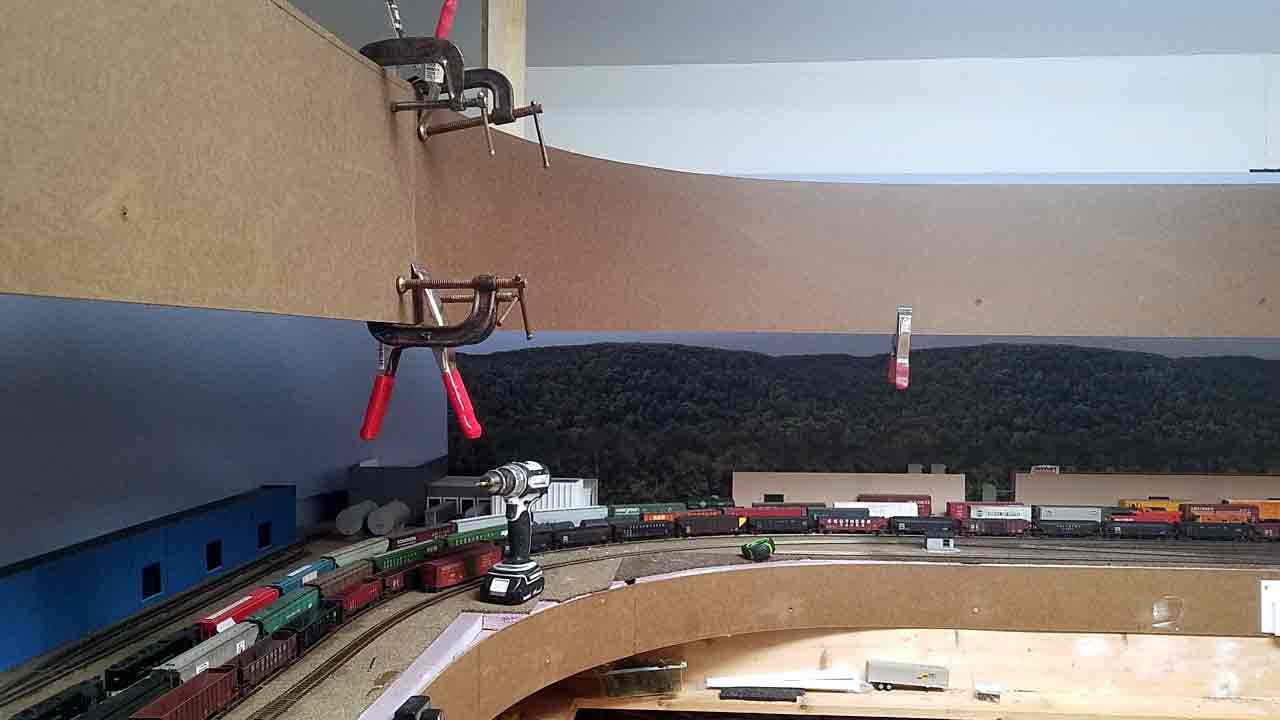
The valence was then attached to the 1x4's. The clamps shown in the photograph are holding a backing plate in place behind a joint while the glue dries. the valences are held in place with countersunk wallboard screws.
Here it is installed over Preston Miller Yard.

Under valence lighting on the lower level is being done with LED strips. I made some brackets out of 1x4 scraps and glued them to the back side of the valence. Two holes were drilled in each bracket to facilitate a second strip of lights if needed. The LED strips were purchased on ebay in 3 color temperatures, warm(2700), natural(4000} & cool(5000), for testing. I have settled on the natural LED's

Memphis Junction
As most of you probably already know, I tend to bounce around the layout from one project to another. Lately, I've been spending some time on the Memphis Junction scene. Memphis Junction is where the MBG&C Bowling Green depot (Construction Update #37) is located. After giving it some thought, I decided to cut out a 1x6 foot section of the existing scenery base and start the scene on the desk in my workroom. Unfortunately, it was impossible to get it out in one piece.


Here's a view of the scene sitting on the chair in my work room. From left to right is the Memphis Junction Tower (Walthers I think), the back of the Woodland Scenics ready built appliance store, a street and parking area, the depot (Walthers) and a small park with flagpole. A street running spur runs down the street behind the depot.

Here's another view looking north. My work desk is always a mess. Making room for a 1x6 chunk of pink foam was a challenge.

I generally like to lay things out on my desk before I assemble them. About $100 worth of Walthers Asphalt Street System was used behind and around the depot. I finally started using ,060 black styrene to avoid purchasing more. To make matters worse, I started out with the brick street system before changing over to the asphalt.

Here is the scene back on the layout for some background planning. I find most of the Woodland Scenics ready built structures to be a bit over done so I used the back side of the appliance store here at Memphis Junction. At one time, the tall structure on the left sat behind the yard at Preston Miller. I'm not sure it will stay but it looks a lot better here than it did behind the yard.

I'll wrap up this update with this street scene photo. The street scene/photo was taken 2072 miles away from were I am modeling... but it works, the perspective is just about perfect. The only change I made was to photo-shop the word "Hollywood" off the hill in the background. The building on the left, done with a photograph, is from PTF Designs. Several PTF building fronts were given to me by a friend. Some of them are pretty good. I did purchase one, Lucky's Irish Pub, that isn't nearly as effective as this one.
